Page 3 of 3
Re: First build
Posted: Fri Jan 19, 2024 12:24 pm
by Heikki
I'll need to check if I still have the ideal values somewhere. The E standard values should be pretty close to 1 dB per step.
Re: First build
Posted: Fri Jan 19, 2024 12:45 pm
by Script
And thanks for the walkthrough regarding calibration. I have to get the computer up and running. I changed machine and it's still awaiting complete reinstall.
What software did you use to get the THD graphs of the other units? Or is that excel fed by hand?
Re: First build
Posted: Sat Jan 20, 2024 3:59 pm
by Heikki
Here is the libre office spreadsheet I used to create the curves
http://ghr.fi/proaudio/diodecomp/diodi.ods
Re: First build
Posted: Sat Jan 27, 2024 2:13 pm
by Heikki
More accurate resistor values for the gain switches.
140
170
190
240
280
350
440
560
730
1k
1.4k
The values on the schematic have a tolerance of approximately +/- 0.1dB. Values listed here should be closer to +/- 0.02 dB
-
Re: First build
Posted: Wed Feb 07, 2024 12:43 pm
by Script
Thanks for the high-precision values for the Gain rotary. I soldered it, using up to two hand-matched resistors in series for a few values. Easy enough. The steps are spot on.
Otherwise I have been playing with pots to assess whether log (A) wouldn't suit me better.
THR A1k sure feels more sensitive than B1k
RAT A10k also feels better for dialling in more subtle settings
REL not decided yet, maybe log too, cos 350 or 400 or 450 ms are not that much different, 1s does make a difference though
ATT maybe log too, especially for fine-tuning to catch transients. Needs more testing.
___
Overall, the same settings as on the dual comp (diode & vari) are very effective: ATT 1k, REL 47ms, RAT about half, THR adjustable for fine-tuning. If GAIN is stepped, I'll likely keep THR as a pot, or 24-step rotary maybe.
Re: First build
Posted: Thu Feb 29, 2024 12:43 am
by yan6
Hi folks, this is my first post here so a bit of an introductory. I'm excited to try and build one of these but this is my first venture out of the diy synth community. I was just wondering about the control wiring. In the schematic they are just blank resistors so I was looking for confirmation that I have these shown correctly.

- Controls Question.png (153.33 KiB) Viewed 159104 times
What vu meter specs are suitable for the shown circuit
Finally I just wanted to confirm that 1n4007 is good for D73 & D74
Re: First build
Posted: Thu Feb 29, 2024 3:58 pm
by Heikki
yan6 wrote: Thu Feb 29, 2024 12:43 am
In the schematic they are just blank resistors so I was looking for confirmation that I have these shown correctly.
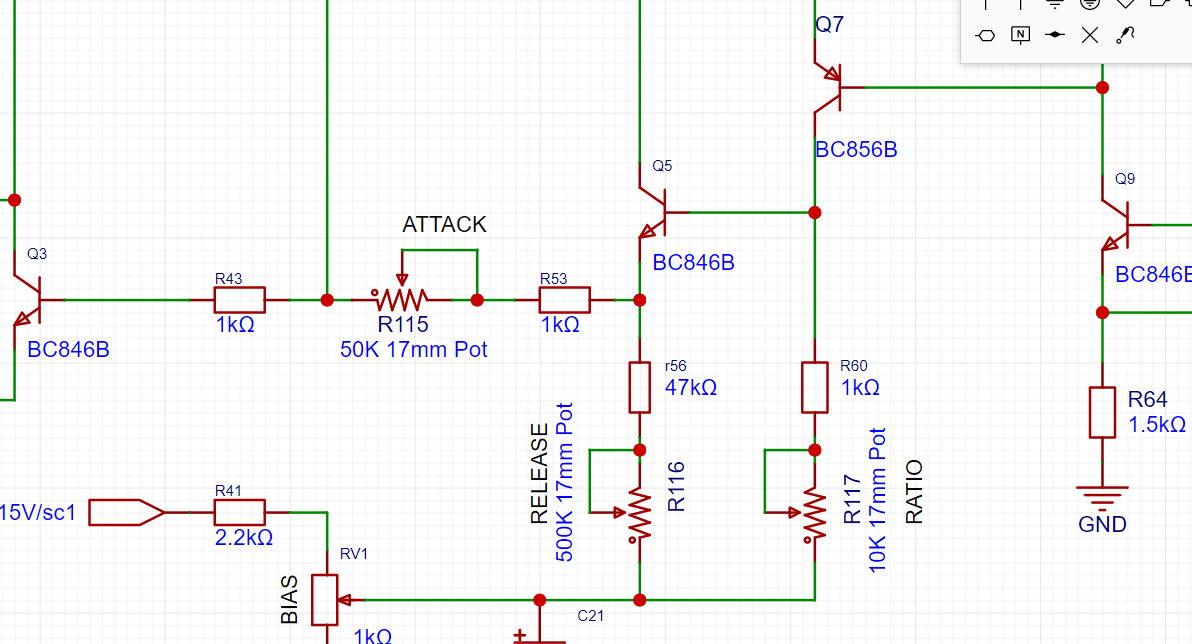
Those values look good to me. If your timing cap is 1uF your attack is approximately variable between 1 ms and 50 ms and release between 50ms and 550ms + attack time.
What vu meter specs are suitable for the shown circuit
Pretty much any 200 uA meter will work. 100 uA meters should work too.
Finally I just wanted to confirm that 1n4007 is good for D73 & D74
I used 1N4148. If 1N4007 has similar forward voltage at around 1mA current then it is fine.
Good thing to check is that the voltage across D73 and D74 is almost identical when when the threshold pots RV3 & RV4 are turned to max (500 ohm). RV3 & RV 4 should be matched since potentiometers usually have 20% tolerance.
Re: First build
Posted: Thu Feb 29, 2024 7:44 pm
by yan6
Thank you Heikki, also what is the value of R93 & R94 in the CV section, 1K?
Re: First build
Posted: Fri Mar 01, 2024 4:29 pm
by Heikki
Script wrote: Thu Jan 18, 2024 1:12 pm
For GR indication, I ran a cable on underside of board from sidechain CV1 out to onboard J13 (CV1 VU meter driver input). Stuffed R93 and R94 with resistors equivalent to VU meter resistance. Looking good for now.
Heikki wrote: Thu Jan 18, 2024 7:21 pm
Value of R93 and R94 will depend on what meters are used but probably resistor equaling the meters resistance is good starting point. With some meters D83 and D84 might have to be removed.
Re: 32 Diode Bridge Compressor
Posted: Mon Mar 24, 2025 3:02 pm
by Heikki
Gerber files now available for everyone.
viewtopic.php?t=104